
Textiles have memory and can also take on new memory and shape. How we handle textiles, stitching by hand or machine, cutting straight, curvilinear or on the bias (diagonal), sewing curves, surface embroidery, and quilting all disrupt the weave of fabric.
This particular quilt began with a piece of white cotton fabric hand dyed and backed with cotton batting and a muslin quilt back. If I’m not hand sewing, the cotton batting works fine for machine sewing.
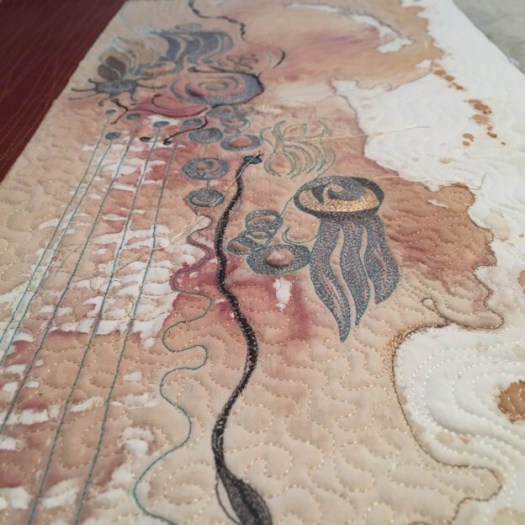
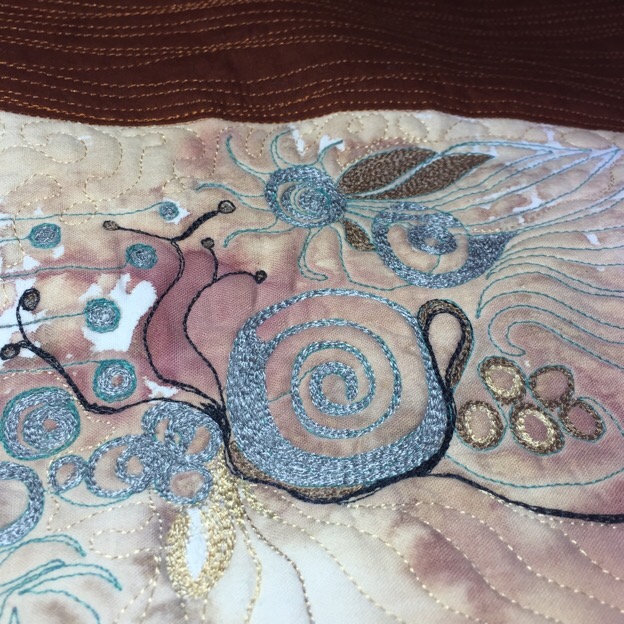
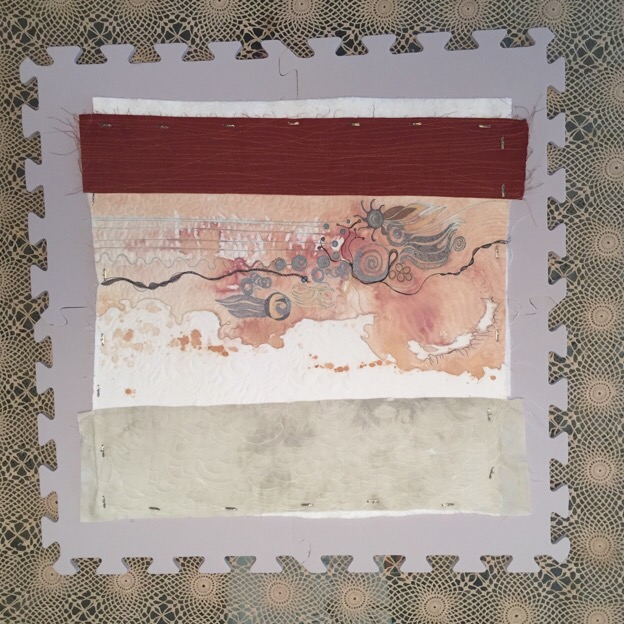
I quilted an overall pattern in a medium teal Metrosene thread and then began to add thread painting with shades of silver, graphite, burnt sienna, gold, black and bronze rayon embroidery threads. I added the top grey and bottom rust sections after the majority of the thread painting was underway.
Then the final quilting helped to flatten out the lumpy bumpy hillocks and creases left from heavy but uneven thread painting. Still wonky and now only a series of gentle rolling bumps and lumps the last step is to block before finishing. Photo below shows some of the warping that happens to fabrics that are stressed.
Before binding, the quilt will be dampened and blocked to de-stress the fibers and give it the shape I want it to have.
For smaller textile projects I use a blocking grid sold at Knit Picks.

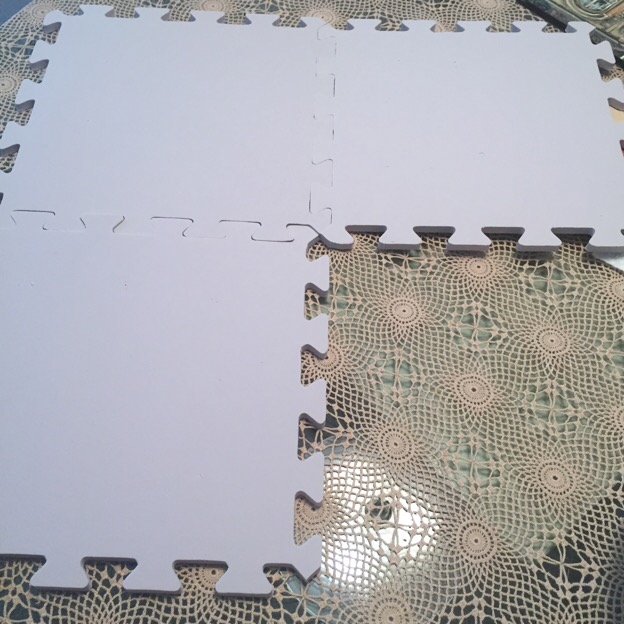
The blocks are an interlocking grid that can be used many times over. 9 foam blocks come in a pack and can be put together in many configurations. You can purchase double or triple sets if you need them for larger projects. These have a small footprint for storage and last for years. I know you can use large inexpensive insulation board or even a carpet. The insulation board comes in 8′ sheets and a carpet would need to be rolled up for storage. I don’t have that kind of extra room to store bulky objects in my studio. At $24.99 they are a good deal and they store on a shelf.
You’ll need the following:
Blocking grid or mat
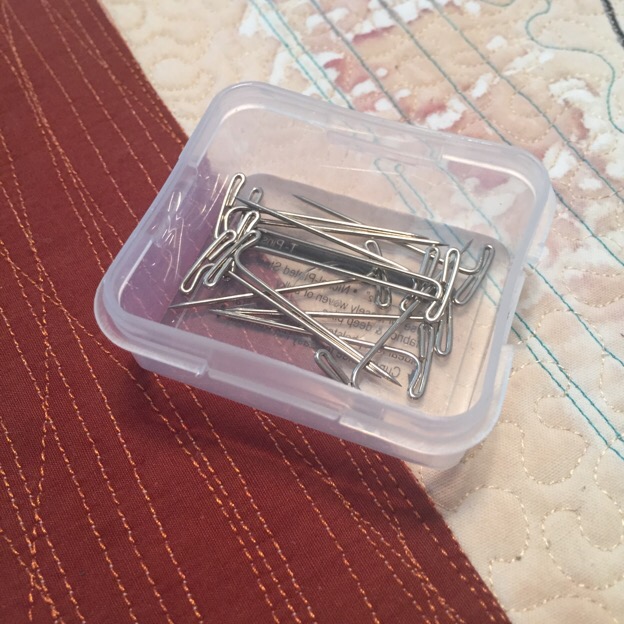
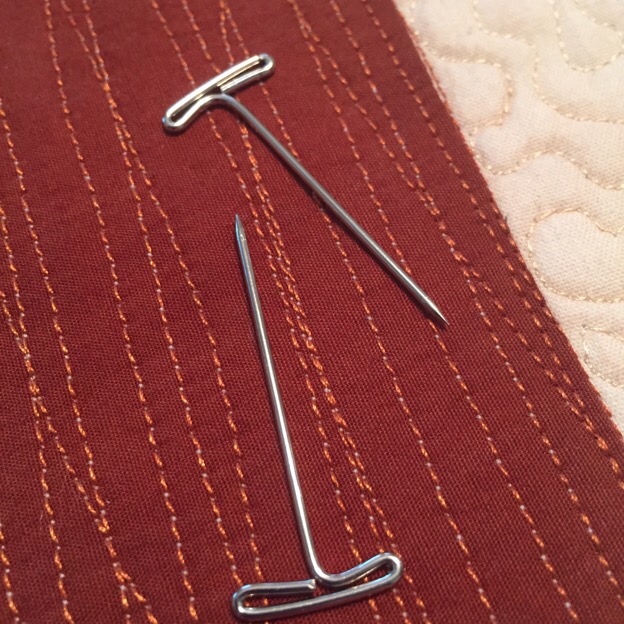
T-pins (rust proof stainless)
Spray bottle filled with fresh clean water
I put enough blocks together to make the grid fit the quilt in this case 4 sections work.
Placing the quilt face down I spray generously with water and smooth it out with my hands. I flip the quilt over squarely in the center of the grid and spray the top with water. It should be damp but not soaking wet.
Next the pinning begins. Starting at the center of the top, taking a t-pin, I press it at an angle through the quilt edge into the foam block.
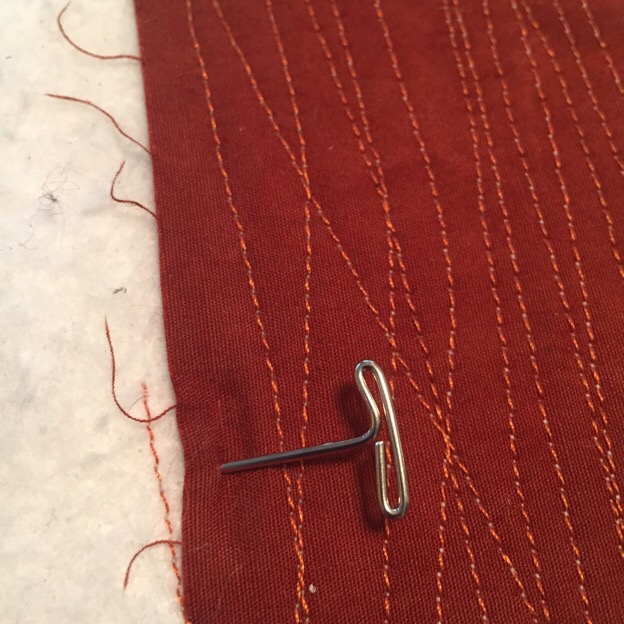
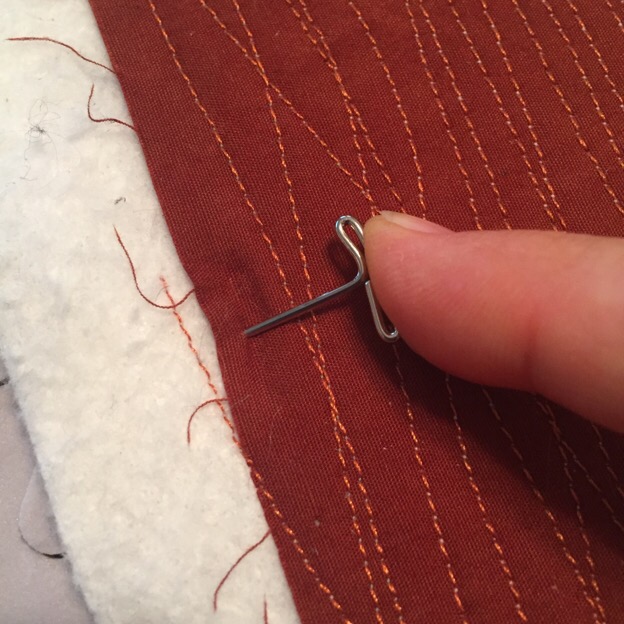
I continue to place a t-pin at each center point along each side–while gently stretching the quilt and smoothing it. Then push a t-pin 3″-4″ apart on each side of the center pins. Again, I gently smooth and stretch the fabric as I go. Repeat on each side until the quilt is fully but gently stretched. See the photo below – pins evenly spaced and sides of quilt look wonky. They will be trimmed after drying.
My home is very dry and if I do this at night by morning the quilt will be dry and flat. The next step will be to trim to the size I like and bind if desired.
Below is the next day – flat and free from ripples:

Note: I do not use an iron or steam unless it is absolutely necessary. I use a mixture of fibers and a hot iron could negatively affect delicate threads or fabrics with a hot iron set on cotton and would flatten the beautiful quilting textures. I also don’t use measuring guides. These are handmade, work of art and meant to meander and have shape and texture. I am not looking for perfection, but want it to hang crisply and neatly.

This is interesting. It reminds me of blocking for knits. Thanks for the step by step, now I understand the process I will add to my appreciation of this kind of work.