Hastily searching for a sketchbook last week, I found a 4×6 booklet behind my leopard fabric covered chair where I sit and draw. Leafing through it, I found some fun sketches I did in February 2016. With few art tools and being winter house-bound I turned to sketching between stitching to keep my mind open. Little did I know that my purple pen drawings would be found around the same time as the passing of Prince.
Prince left us in the spring of 2016. I’m lamenting the loss of this talented artist for several reasons. He and I were of the same generation. His talent and kind nature are legendary and I admire him. His legacy will continue. Enjoy the sketches!
Many thanks to the vibrant and hardworking students of Kutztown University and their beautifully lit gallery on the main street in Kutztown.
These students are smart and resourceful and work hard to bring art to the community. They wrote and asked if I would be interested in having an exhibit at Eckhaus Gallery in the spring of 2016. I agreed and then they handled everything – all I had to do was show up on the appointed date and they were prepared to hang the show with me. After quickly explaining my required selection and placement of objects they set about measuring and hammering.
The conversation was rewarding and it was interesting to hear what they had to say about art and college and their own plans for their art or careers. We had a lot of fun working together – and they were so willing to assist in every way with carrying work, handling it carefully and with respect, arranging for posters, price lists, photographs, publicity and a signboard. Senior students provide structure and have interns working along side to provide support. Their willingness to lead, listen, support and general good nature is one of the reasons I truly enjoy working with student groups. The evening for the exhibit was March 18th and they provided food and drink, a sign board on the street, and interns were there for support to help collectors and guests with questions.
Danielle Notaro – a poetic collaborator dramatized her poetry while giving a tour of my works that were one display. It was a memorable early spring evening!
Several new series were born as a result of doing small studies this winter. The studies are being shown this weekend as a part of exhibition containing a few watercolors and some significant works in fiber that are eco-dyed, handprinted and hand embroidered. I am an irreverent quilter and don’t follow many rules. Sometimes I experiment with fusible, battings and surface design before I quilt. The purpose of it all is to find the look, I am searching many traditional techniques and then bending them to my own style to get a texture and quality that I am not ready to define yet. I’ll know it when I see it.
Cutting on the bias, using my sewing machine, or working by hand, washing, ripping, tearing, machine thread painting, hand embroidery, framing, binding, not binding, giving structure on wood panels, using bamboo to hang work, vintage silk, found objects, eco-dyeing, tea dyeing and over-dyeing, mono-printing, heliotypes, and beading are a few of the ways I am working with fabric now.
Emerging are what I call Spirit Cloth’s…they are worked in a meditative state and result in a pure form of hand and mind being one and the same, a positive flow of the spirit of the artist.
There are also images born out of my love for the earthiness of tilling and gentle farming of grains and vegetables. The works include deep night skies and are simply stitched by hand.
Its a great time for me and my need to explore what is available to me in fiber and art. Today I am scaling up one of the series and am excited to find new ways to bring the color and stitching to life…
Textiles have memory and can also take on new memory and shape. How we handle textiles, stitching by hand or machine, cutting straight, curvilinear or on the bias (diagonal), sewing curves, surface embroidery, and quilting all disrupt the weave of fabric.
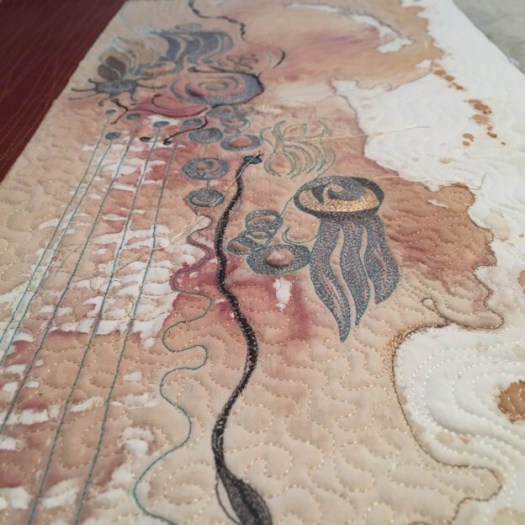
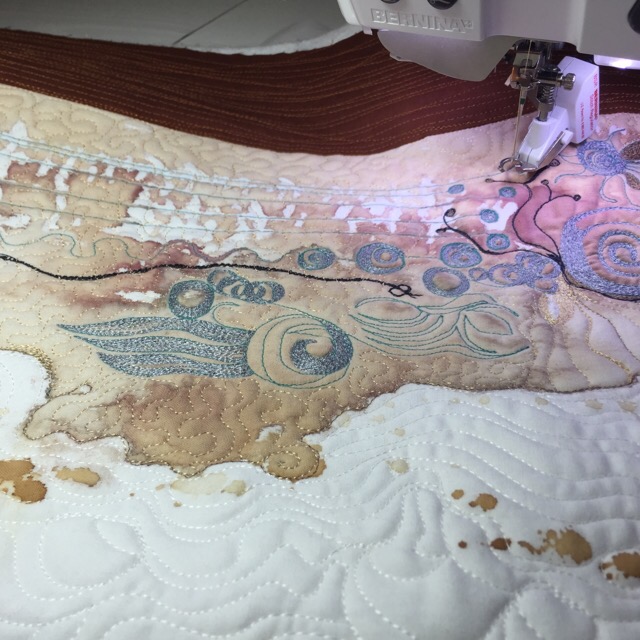
This particular quilt began with a piece of white cotton fabric hand dyed and backed with cotton batting and a muslin quilt back. If I’m not hand sewing, the cotton batting works fine for machine sewing.
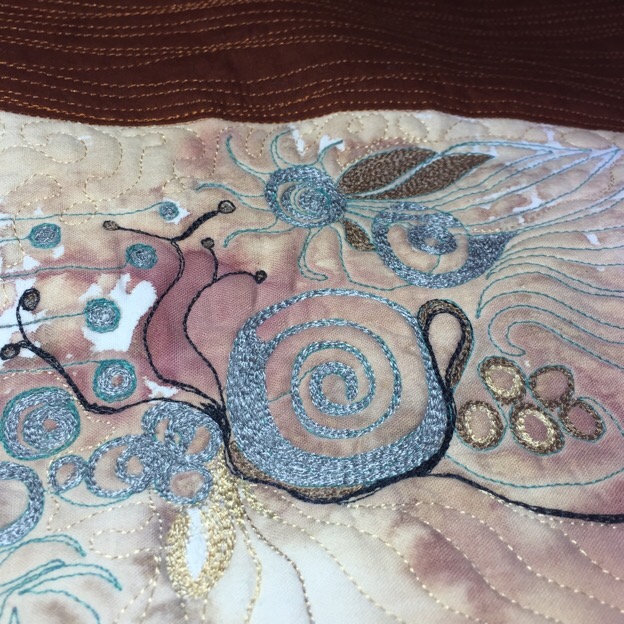
I quilted an overall pattern in a medium teal Metrosene thread and then began to add thread painting with shades of silver, graphite, burnt sienna, gold, black and bronze rayon embroidery threads. I added the top grey and bottom rust sections after the majority of the thread painting was underway.
Then the final quilting helped to flatten out the lumpy bumpy hillocks and creases left from heavy but uneven thread painting. Still wonky and now only a series of gentle rolling bumps and lumps the last step is to block before finishing. Photo below shows some of the warping that happens to fabrics that are stressed.
bumps and hillocks from quilting and thread painting
Before binding, the quilt will be dampened and blocked to de-stress the fibers and give it the shape I want it to have.
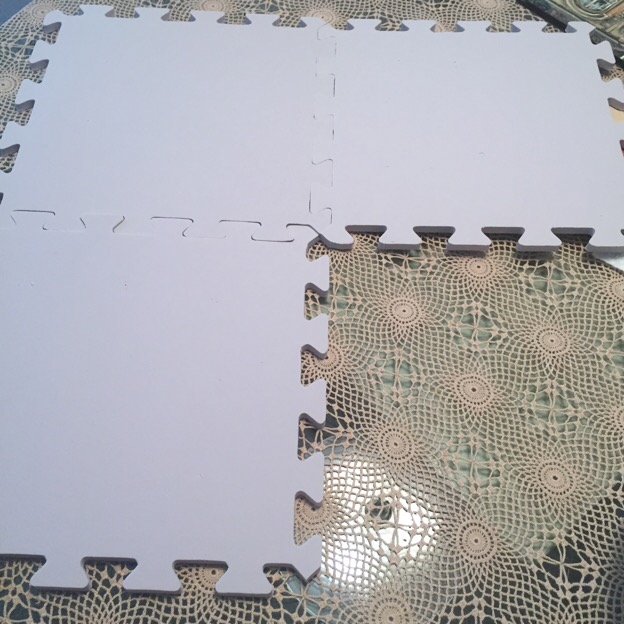
The blocks are an interlocking grid that can be used many times over. 9 foam blocks come in a pack and can be put together in many configurations. You can purchase double or triple sets if you need them for larger projects. These have a small footprint for storage and last for years. I know you can use large inexpensive insulation board or even a carpet. The insulation board comes in 8′ sheets and a carpet would need to be rolled up for storage. I don’t have that kind of extra room to store bulky objects in my studio. At $24.99 they are a good deal and they store on a shelf.
You’ll need the following:
Blocking grid or mat
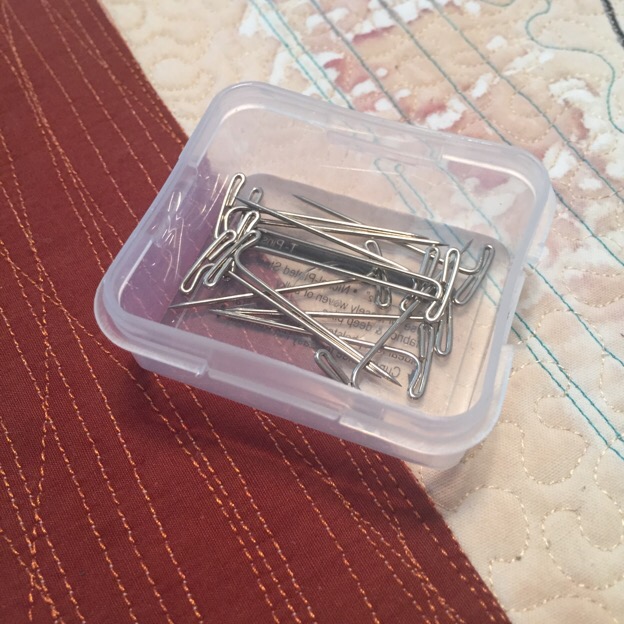
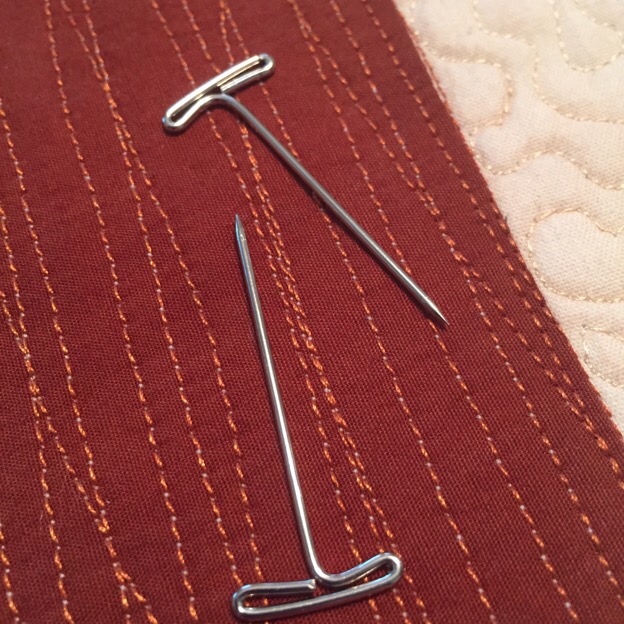
T-pins (rust proof stainless)
Spray bottle filled with fresh clean water
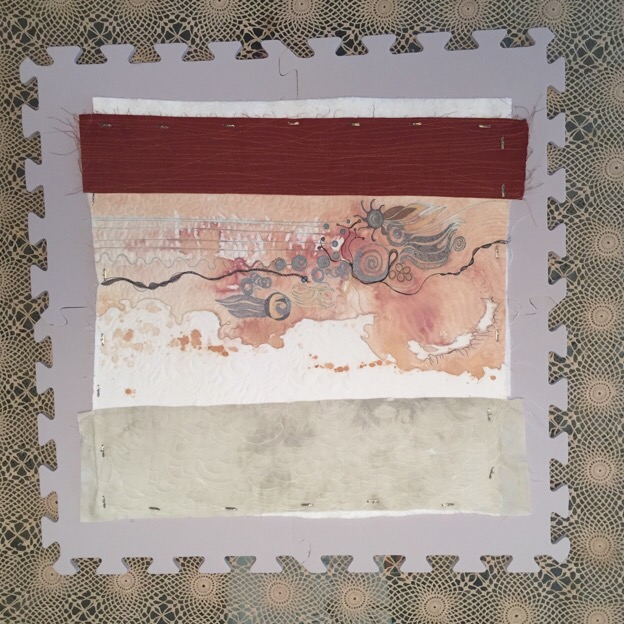
I put enough blocks together to make the grid fit the quilt in this case 4 sections work.
Placing the quilt face down I spray generously with water and smooth it out with my hands. I flip the quilt over squarely in the center of the grid and spray the top with water. It should be damp but not soaking wet.
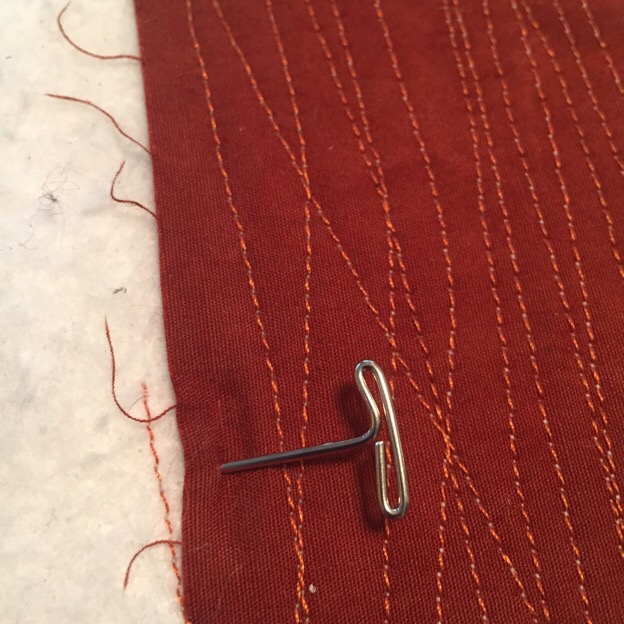
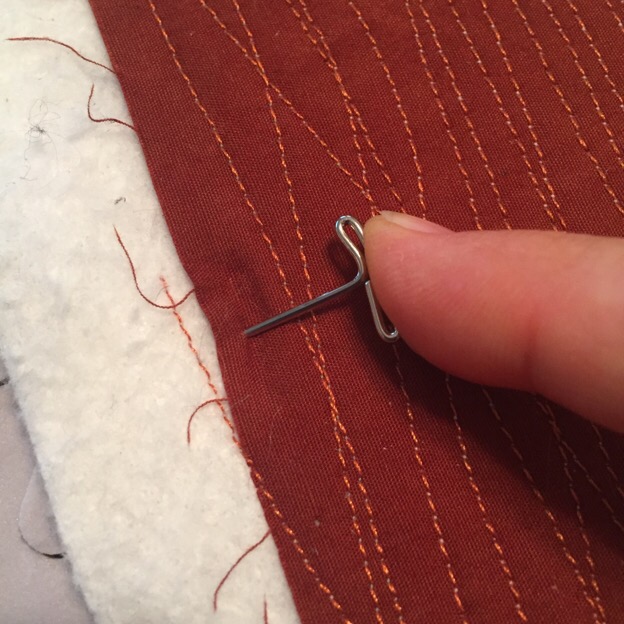
Next the pinning begins. Starting at the center of the top, taking a t-pin, I press it at an angle through the quilt edge into the foam block.
t-pin in center
final push
I continue to place a t-pin at each center point along each side–while gently stretching the quilt and smoothing it. Then push a t-pin 3″-4″ apart on each side of the center pins. Again, I gently smooth and stretch the fabric as I go. Repeat on each side until the quilt is fully but gently stretched. See the photo below – pins evenly spaced and sides of quilt look wonky. They will be trimmed after drying.
pinned, damp and ready to dry
My home is very dry and if I do this at night by morning the quilt will be dry and flat. The next step will be to trim to the size I like and bind if desired.
Below is the next day – flat and free from ripples:
Note: I do not use an iron or steam unless it is absolutely necessary. I use a mixture of fibers and a hot iron could negatively affect delicate threads or fabrics with a hot iron set on cotton and would flatten the beautiful quilting textures. I also don’t use measuring guides. These are handmade, work of art and meant to meander and have shape and texture. I am not looking for perfection, but want it to hang crisply and neatly.
Needles breaking. Threads breaking. Again and again. Adjusting tension and trying little tricks to keep everything running smoothly.
It happens with hand stitching too. Knotting up, catching a thread on the back, tangling. Sometimes it’s that kind of stitching: tangling and knotting.
Learning to wrestle wrought threads.
wound tightly.
Unbound.
Loosened. Breathing.
Softness.
This is the nature of thread work. It teaches me to allow anger in and out—no withholding of breath. Letting it be its own nature. Turn off power and tidy the sewing room. Go to relax and read a bit
morning. opening the sewing desk and do my morning ritual of preparing the machine with basic maintenance. Open the bobbin case. Get the dust remover, brush and oil. Ahah! The culprit exposed in the sunlight streaming through the window. A tiny speck of shredded rayon thread is barely visible under the auto cutter. Another fine long strand is found at the bottom of the case
I remove the threads, flush with air, brush well, oil bobbin and put it all back together.
Last night I did that twice. But I couldn’t see the small specks of thread. Even with my Ott Light.
Under light of day everything is exposed and seen with clarity.
Learning balance and timing, during fatigue and frustration was not the time to problem solve. Bernina sews like herself again.
jonas kept me indoors and stitching while the white flakes were flurrying furiously out of doors. stitching while drinking copious cups of constant comment tea. time to think while i stitch. stitching and staying present. the needle keeps my mind fresh and fingers nimble. watch the thread, like a bell, a prayer wheel, staying with it. mother reads and cleo snores gently. rory guards our home while we sit out the storm.
Prayer Wheel – spokes
Prayer Wheels
moving through the piece
Prayer Wheel – Edge
Top Down
sharing the process
overview
time for more tea. Thoughts come. Go. Pass through the wheels.
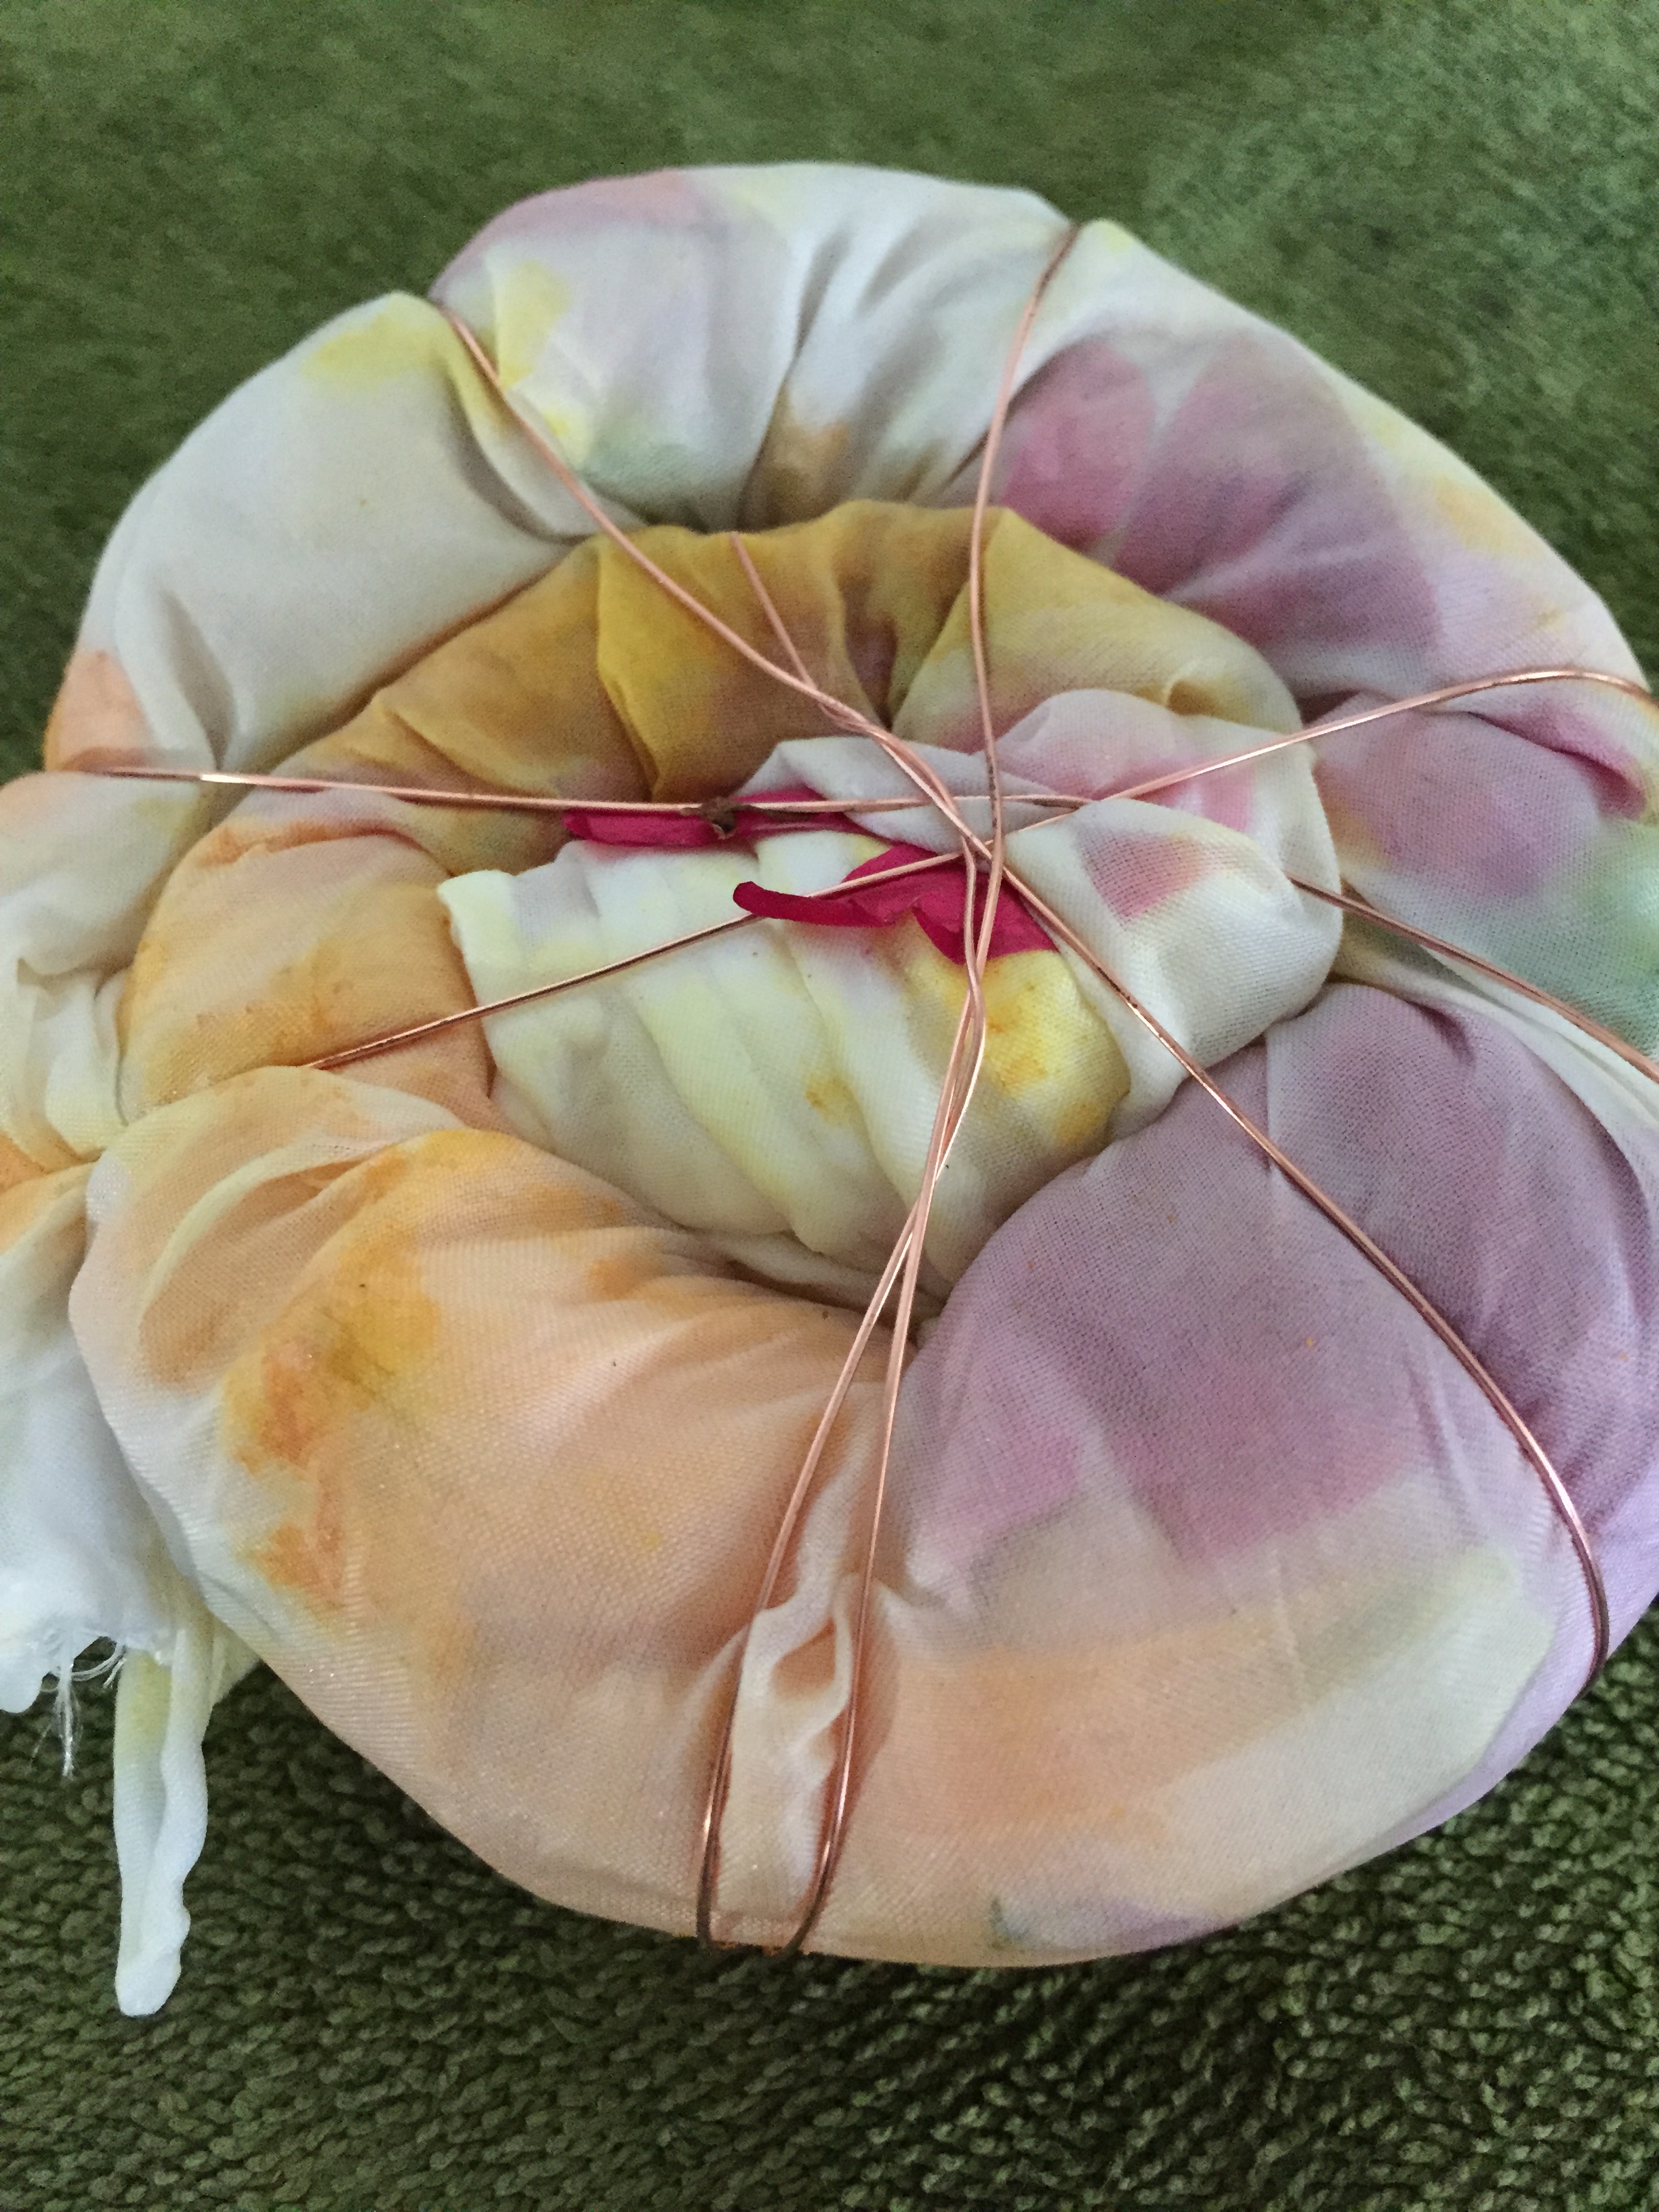
Spiraled silk stuffed with garden blooms, wrapped with copper wire
Deadheading annuals and perennials is no longer such a chore, now I look forward to gleaning the spent blooms to eco-dye fabrics that I can use to create intentionally embroidered objects.
Sunday I bundled a dozen silk fabrics with zinnias, hibiscus, maple leaves and some native Pennsylvania wildflower heads, with various tea leaves and spices, rolled them up tightly, wound into spirals and wrapped rightly with copper wire. Placing them into zipper bags with vinegar and then into a small washtub to wait…2 – 3 weeks before removing them and drying the fabrics which will then be ironed.
Its a hedgewitchy-alchemical process, the gathering, crushing the flowers, making these brews and the waiting. Its a slow process. And much slower than opening a tube of paint and squirting it out, blending and brushing it onto a canvas. It is spontaneous though and allows for much experimentation which I appreciate.
Waiting Marigolds
Wrapped Rose Petals
Red Cabbage Rose Hips
Locust Tree Nut Shells and Spices
Turmeric and Zinnias
A Dozen Working
This is part of an evolution that I am in—-slowing down—-making the art slowly, mentally absorbing the process documenting it. The waiting, wondering which blends will be favored and successful. When I woke this morning, I checked them first, as they reside in my bathtub, packed into a small red washtub, the aroma of flowers and spices hit me full in the face. What a pleasant way to make art.
Spirals are making their way into my work again, aboriginal and abstract, the essence of life, they are an image that seems to be often found in my art.
I’m using the red……
the essence of what connects as humans.
women to their children.
bloodlines.
The Red and The Blue.
Mitachondrial DNA.
Green. Life. Planet.
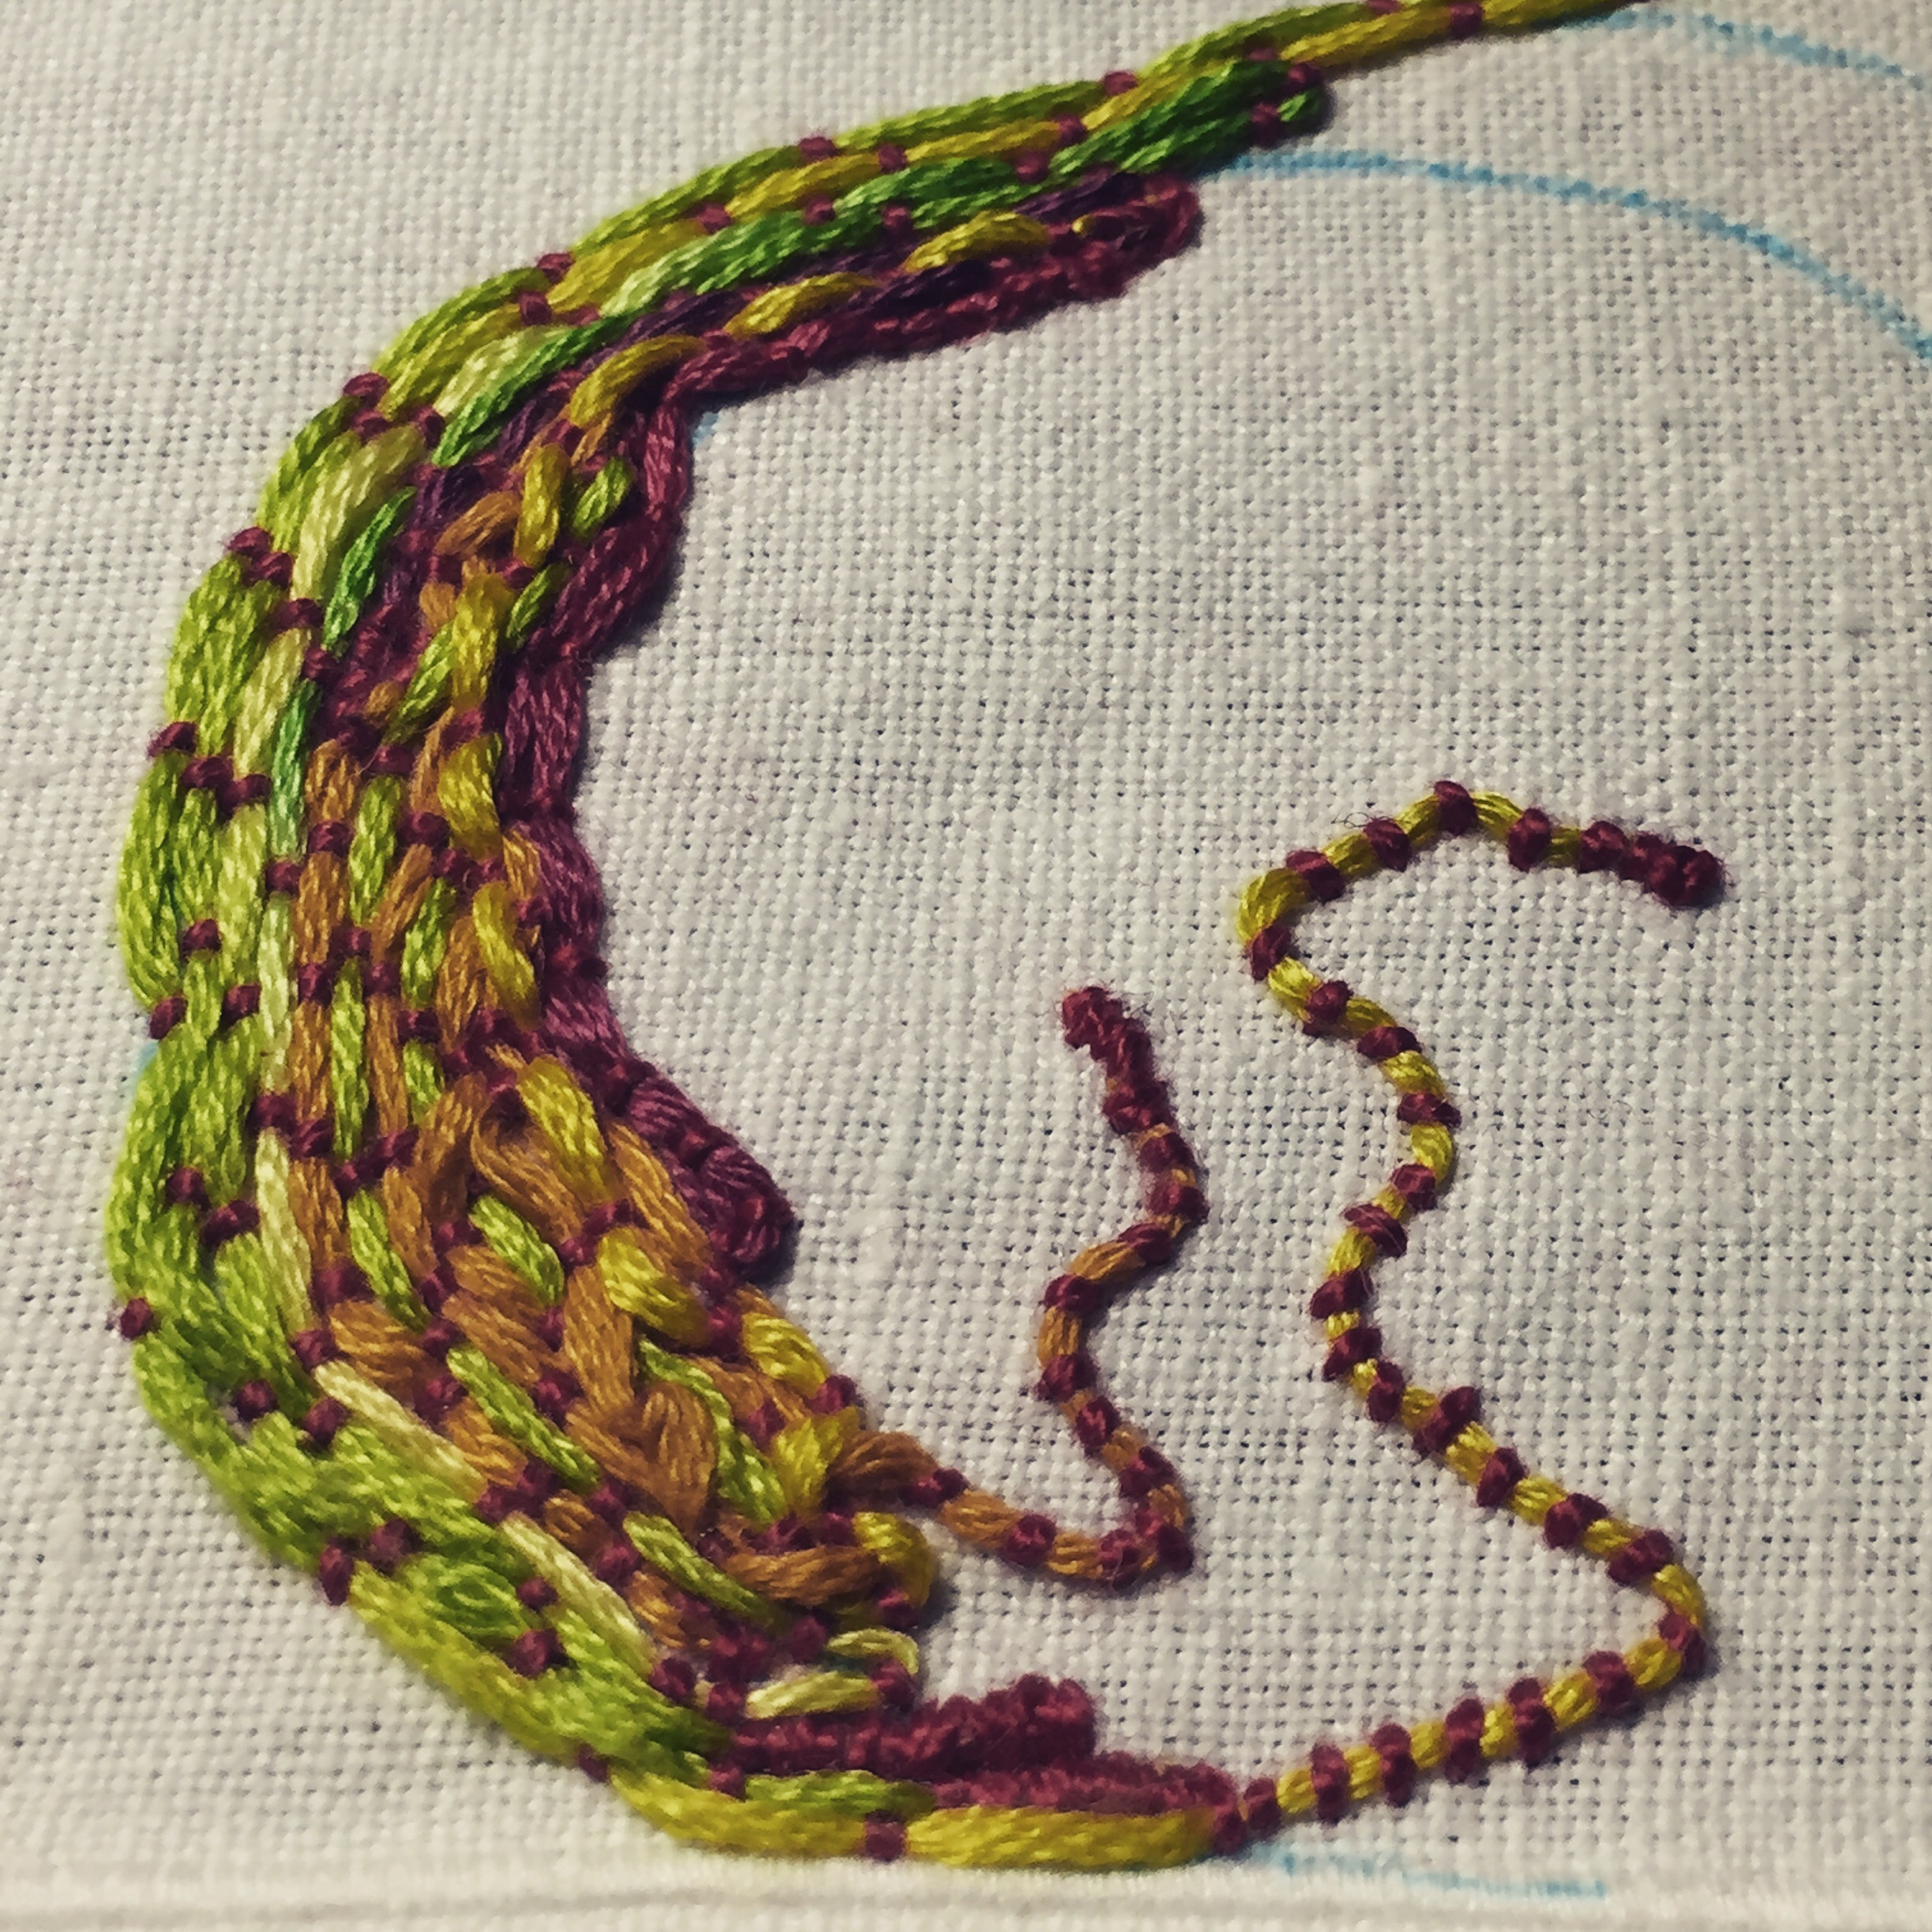
Couching silk/bamboo yarn onto a vintage linen napkin. Red threads were used traditionally in Red Work Embroidery and Turkey Work.
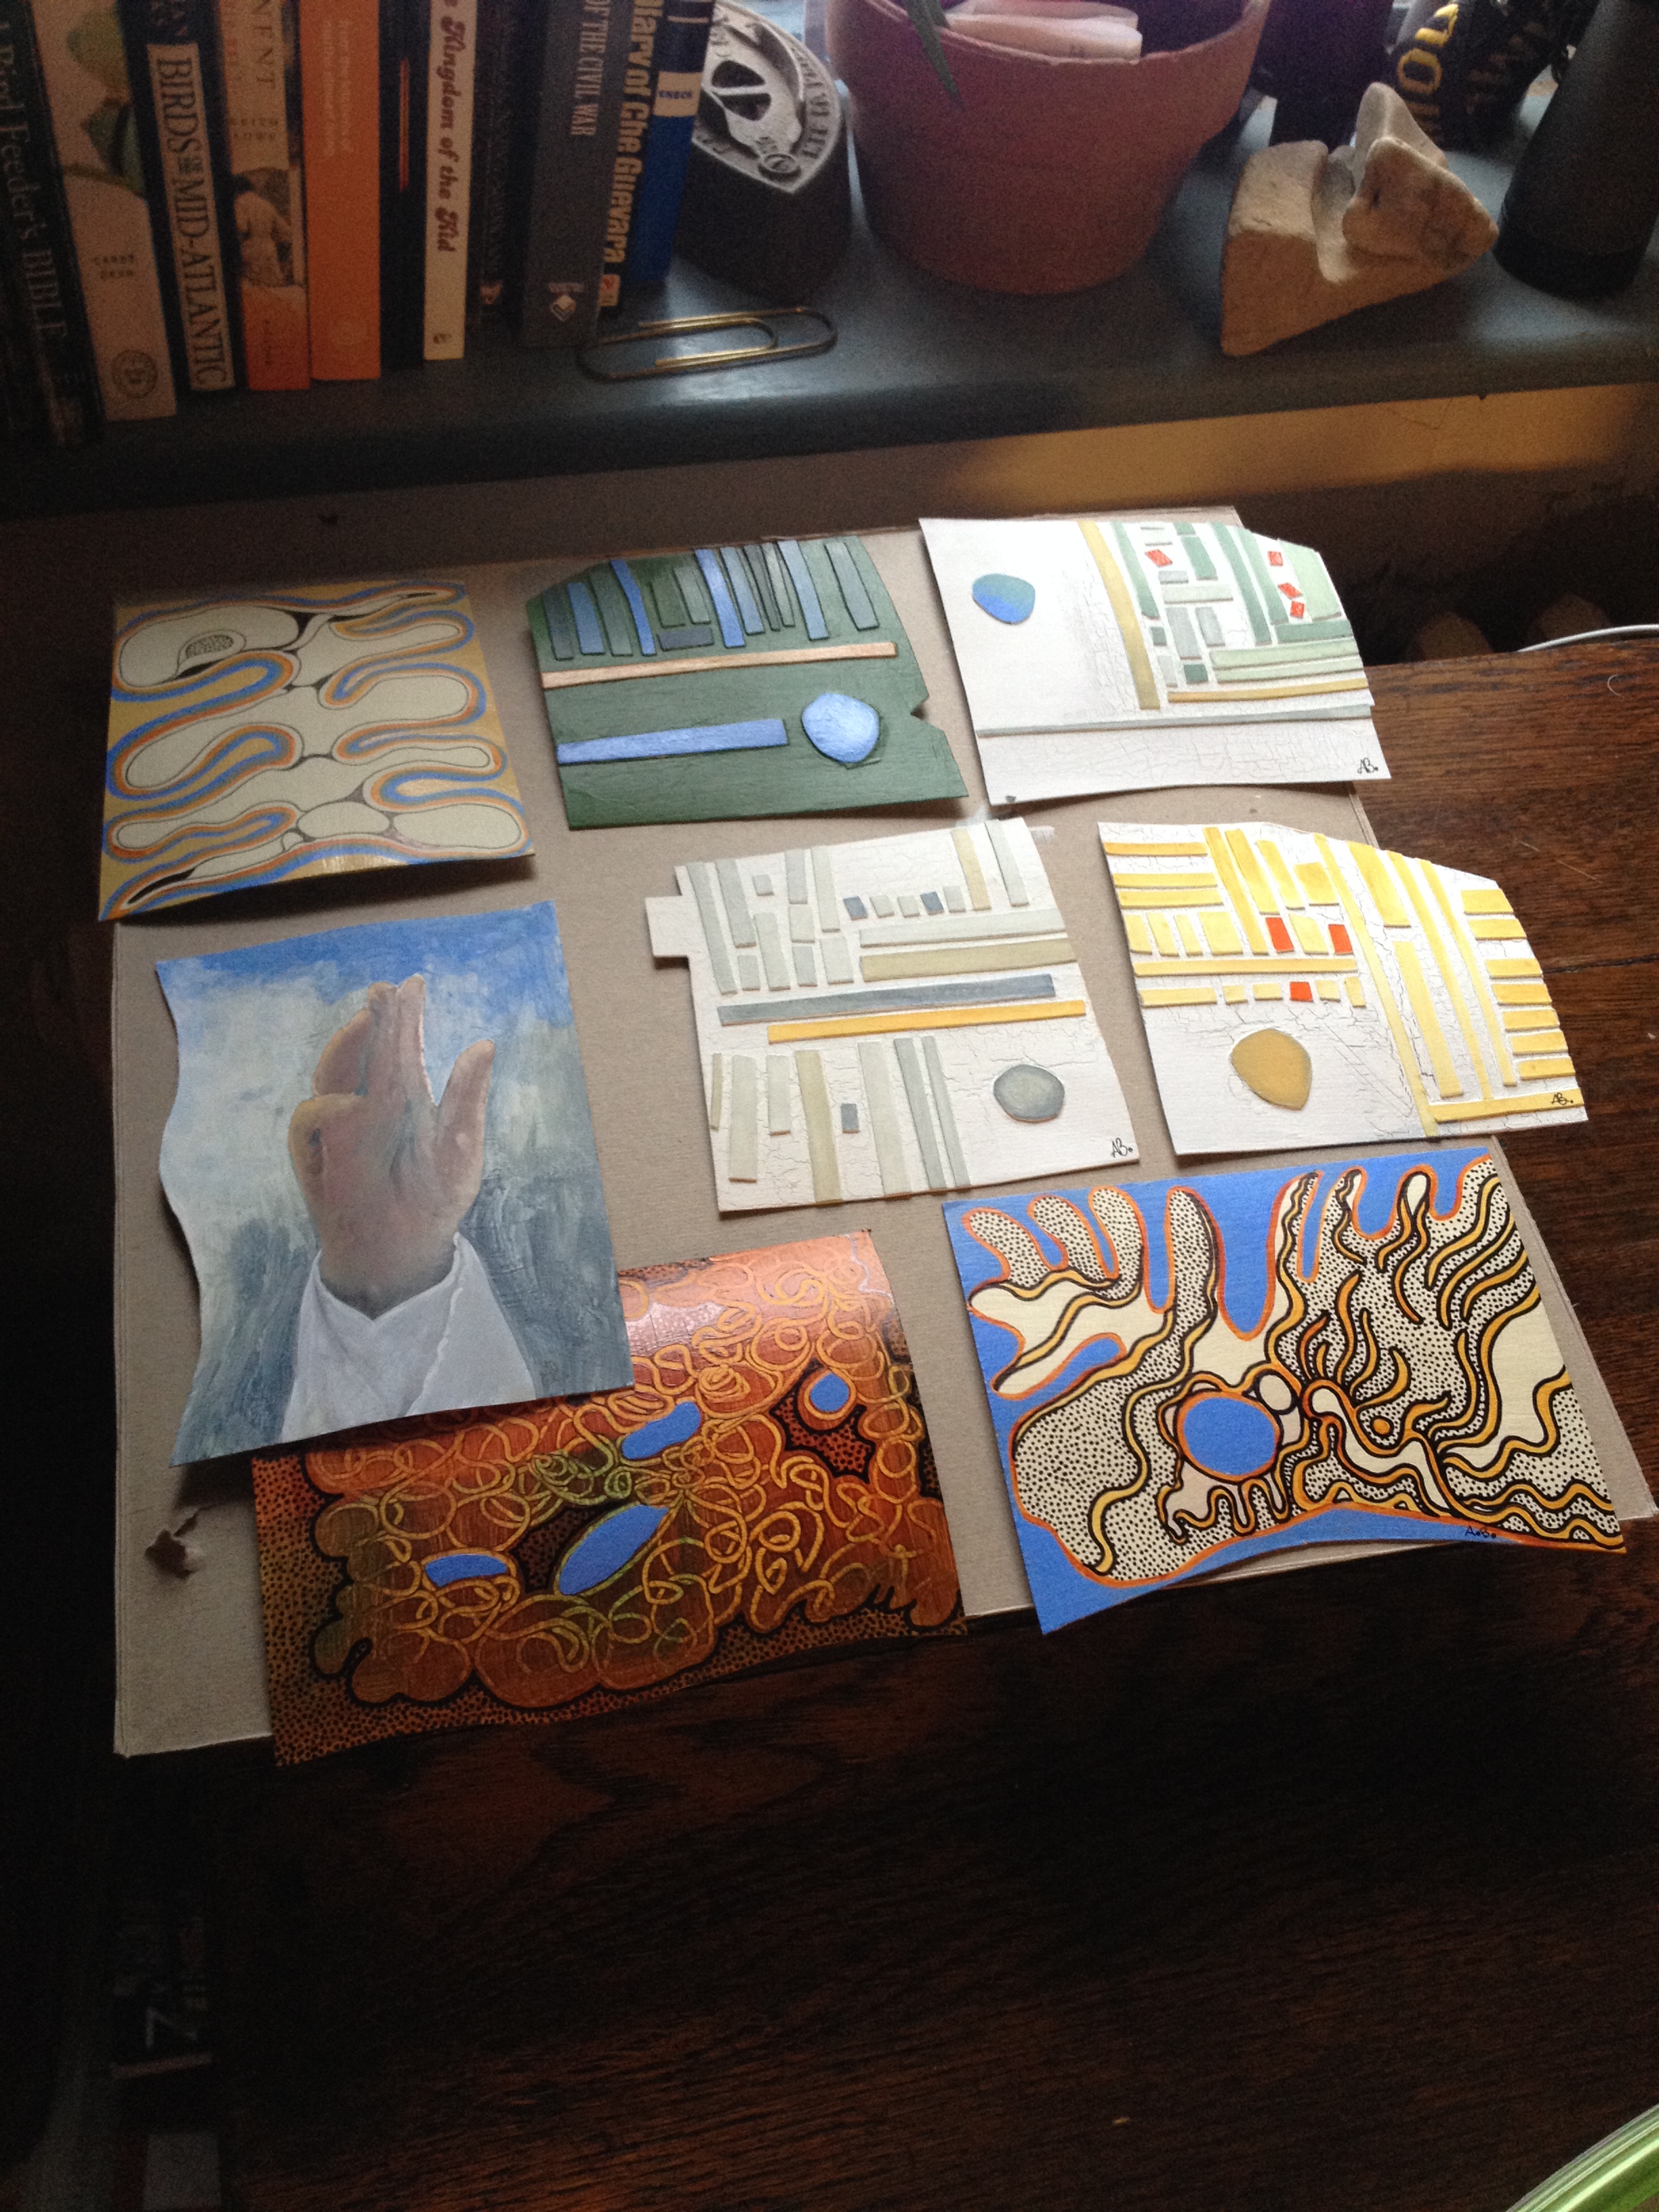
People often ask how I create my watercolors. Next time I perform this process I will make a video but here is a description in the meantime.
I cover the floor with as many pieces of high quality watercolor paper that I have room for. I thoroughly wet the paper(s) with water by either using a spray bottle or large 4″ brush. This wetting is a throwback to a time when I soaked paper for printmaking. Next, I mix the colors I that feel or look good to me at the time. No planning, but I do select color based on how I am feeling at the time. I use the tools at hand, literally my own hands work the large washes along with huge mop brushes, but there are fingerprints, and a sleeve dragged (possibly) through the work during the original throwdown of paint onto paper. The brush does a loose dance and my fingertips direct the magic. I allow the wind, sand, bark or other fragments of the life from Gaia come into the work. Mother Earth has her hand in the painting as she allows a leaf to settle or insect to walk across the paper. Often I find objects or materials to use as resists. Some resists are added supplies from the kitchen–often an experiment and sometimes products that I have used before. Salt is a common additive, but oats might be chosen instead.
I allow the paint to pool in deep rich colors or pale watery shades. Then I leave. I rest and let my creations solidify. Usually, I sleep and dream about what is brewing on the paper, my dreams are strongly connected to the work at hand. I have contemplated how much my dreams direct the paint but it is speculation. My imagination though is given wings to soar from the dreams which in turn helps the creation move further along. Sometimes, at a point of partial drying I check back and add more pigments, squeezing the drops out of the brush and allowing them to fall, gravity does the work. Although I often work in series, every piece has its own method, its own manner of coming into being even though they are pointed simultaneously. They are living creatures that continue to thrive under my guidance. It is an intuitive process. I feel connected to the work and allow the paintings to emerge–letting the melange of images come forward and speak out. But its only the beginning. They need time, to flower, to open: to be interpreted further. After all the paintings are dry they are stacked and weighed to keep them flat until I am ready to proceed with adding ink. In Part 2 I will discuss the next layer – Inkwork.
Mailing my card today! I’ll be selecting from the cards I’ve already made and it might be one of the cards in the above photo. here you go Danny Nickerson! For those who wish to participate here is the speed version of Danny’s address. This was on channel 6ABC news and is legit.


 Several new series were born as a result of doing small studies this winter. The studies are being shown this weekend as a part of exhibition containing a few watercolors and some significant works in fiber that are eco-dyed, handprinted and hand embroidered. I am an irreverent quilter and don’t follow many rules. Sometimes I experiment with fusible, battings and surface design before I quilt. The purpose of it all is to find the look, I am searching many traditional techniques and then bending them to my own style to get a texture and quality that I am not ready to define yet. I’ll know it when I see it.
 Emerging are what I call Spirit Cloth’s…they are worked in a meditative state and result in a pure form of hand and mind being one and the same, a positive flow of the spirit of the artist.